Tuesday, September 6, 2011

Creamy Butternut Squash Soup

This is my favorite soup of all time and it couldn't be easier!

  • 1 Steamed or Baked Butternut Squash (scrape out seeds and put the meat of the squash in blender)
  • 1 Cup Chicken Broth
  • 1 Cup Coconut Milk
  • Dried Thyme
  • Salt/Pepper
  • Turmeric
  • Dried Parsley
Place in blender to a smooth consistency and warm to desired temperature.  This is so comforting and I even had a bowl for breakfast one morning.  Tonight I am making cream of broccoli in the exact same way, just substituting the broccoli for the butternut.  Any vegetable/squash would make a lovely soup.


(this was garnished with some dehydrated kale that I made in my dehydrator)


This post brings me to my latest obsession, the Vitamix blender:


I have my wish list in with the family as we speak for Mom's birthday present (that's me!).  I use my regular blender every single day whether for smoothies or soups, and even my homemade dressings.  The price is a little steep but this machine is probably worth every penny.

*Cheers*

Tuesday, August 23, 2011

Paleo Honey Crepes

I am scrambling to think up new "desserts" since I am on strict paleo right now.  This means I can't work with any other gluten free flours that are made with rice, potato, etc.  So that is limiting to the goodies I can bake.  Enter coconut flour!  And almond flour!  There is hope, but it all still needs to be in moderation.  I also realize that making baked goods at all right now is going to stall my weight loss further, so I need to be realistic.

Yesterday I came up with this and I was amazed at how great it was (or maybe I was just starving!)

3 Tablespoons coconut flour/4 Tablespoons for taller crepes
1 Egg
2 Tablespoons sliced raw almonds
1 Tablespoon honey
1 Teaspoon light olive oil
pinch salt
3 Tablespoons almond milk (or other non dairy alternative, water could work)

Whisk until a batter like consistency.  Add more liquid or flour little bits at a time to achieve correct consistency. *Please note coconut flour is not anything like regular flour or other gluten free flours.  A little goes a long way and it involves a lot more liquid than flour to get it right.  The coconut flour drinks up moisture almost double it's own ratio of any other flour, so use it carefully to get your recipes right when working with it.

Heat a skillet to medium hot and put 1 Tablespoon coconut oil (this gives the best flavor)  Pour out silver dollar size portions so it will be easier to flip.  Cook like pancakes and put on paper towel to soak up any excess oil.

Serve with honey.  Yields about 4 small crepes.  You can double the recipe also.

Cheers


These were so delicious.  Light and fluffy :)

Monday, August 22, 2011

Paleo Sorbet

Well I had to think fast today to come up with a dessert that was naturally sweet (although I am not hesitating to use organic honey when I need to).

I just grabbed my frozen bag of berries and added a small amount of orange juice.  You have to get that soft consistency but not make it a smoothie!

This was so good and refreshing and totally satisfied my cravings for something sweet.  Ahhhhhh!


My 30 Day Challenge is underway!

Well folks the time has come to put my fitness and eating program into high gear.  I am not at the target size I want to maintain, so I got inspired this weekend to go completely paleo and when I say that I mean the strict version.

No sugar, dairy, alcohol, and not even certain fruit!...just nature based loveliness of meat, seafood, salads, vegetables, good fats, small amount of nuts, and maybe berries for the sweet tooth that resides inside of me.  I have noticed that I have been craving sugar and wine for the last day or so.  I did have a cheat on Saturday but only a couple glasses of wine and a handful of tortilla chips.  This eating plan does not allow for rice, corn, or any other gluten free flour that I've been eating since going gluten free about 4 years now.  That is going to be a little tough because when I look at my tiramisu recipe on here I realize that is a thing of the past now.  I know why I am not losing weight....gluten free foods are actually more caloric and loaded with carbs, so it really is not a weight loss diet.  I know by the way my clothes fit me that I've actually gained more weight being gluten free but I feel in optimal health despite the extra weight.  It's not a lot of extra weight but you know your body and you can tell when you feel trim and you can tell when you feel puffy, bloated, and not realizing your true potential.

I'm going to take a picture of myself behind the scenes with tight fitting exercise gear to show a before and after.  I am bound and determined to making this a starting point to lose a minimum of 10 pounds, and I plan to use this lifestyle for the rest of my life, but adding in more fruit when my goal is reached, and maybe a celebratory glass of vino :).

If you are interested in checking out some free material to help in your own weight loss goals I recommend this site:

Robb Wolf tools

If you register for his newsletter he will send you all the fundamentals of what a paleo diet is and help you with shopping for your food, etc.

Of course, fitness plays a role in achieving your goals further.  So take the stairs, park as far away as possible from the shopping center, walk instead of ride.  Those decisions will just come naturally as you progress into the lifestyle.

Wishing us all health in this journey of life!

Cheers

Thursday, August 18, 2011

...Special Sentiments...

I haven't shared much in the way of "Positive Spirituality" as one of the topics I would like to cover more.

My mother sent this saying to me in a card and I adored it.  The reason she sent this was that I have a lot of hummingbirds visiting my feeder (as does she at her home), so hummingbirds are always close to our hearts.

"Legends say that hummingbirds float free of time, carrying our hopes for love, joy, and celebration.  The hummingbird's delicate grace reminds us that life is rich, beauty is everywhere, every personal connection has meaning and that laughter is life's sweetest creation."


Here is a stock photo of a lovely bird as my birds were being camera shy!  I was stalking them all day to catch that magic shot but they eluded my camera lens.  I feel being close to nature is one of life's greatest gifts.  When I see one of these birds close by my window it makes me feel alive and connected to something greater; the greater good of the universe.

Amen!


I am so excited that I finally captured a couple images of our hummingbirds.  They are so tiny but I think you can see her/him in there!


Wednesday, August 17, 2011

Fun with Fermentation

I have found some superfoods that I make myself in my kitchen, making them with ingredients that are wholesome, natural, and let me tell you the taste is like nothing you have ever experienced with store-bought items.

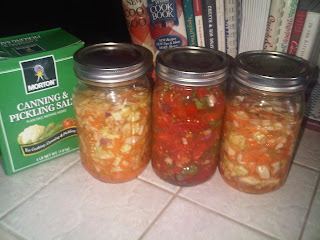
I have some sauerkraut brewing as well as some salsa (my favorite!).

My inspiration for trying out fermented foods are these two books:

Sandor Ellix Katz Wild Fermentation and Nourishing Traditions
You can get the recipes from their books and Sandor has a You Tube tutorial which is terrific.

The priobiotic benefit you get from fermented foods is so good for your digestive tract.  It is much more available than store bought yogurts which are pretty much sugar laden, and the live cultures are speculative since who knows how long since it was manufactured until it reaches your shopping cart.

For the sauerkraut I just use cabbage, onion, and carrots.  You can adapt it to however you like it.  The most important aspect is to add either salt to make your brine (or water and whey from your own plain yogurt), and I usually use both actually.  To make your whey, simply put plain yogurt in a coffee filter inside of a strainer.  Put a bowl underneath and collect the whey overnight in the refrigerator.  Keep that in a mason jar to use when making fermented items.

For the sauerkraut you can use all kinds of other goodies like fresh garlic and any other veggies that appeal to you.  Sandor uses red cabbage and I plan to try that in the future.

You cut up everything and place in a bowl to give it all a great big squeeze to release the juices.  You can add salt over the veggies and squeeze some more.  Taste to make sure it is not too salty but it will be going under water that you will need to add so it will be diluted some with this process.

Place contents in a glass jar with tight fitting lid.  You will need to add more water in the coming days and open top to burp pressure.  The mixture needs to be covered with brine or whey water to keep stabilized and not taint the process with mold or out of control organisms.  Don't let that scare you though!  The benefits outweigh anything going wrong...this is really the easiest thing to do:).

For the salsa, you can use anything of your choice here.  Of course, tomatoes would be a first choice.  I usually add red onion, cilantro, sometimes fresh garlic.  And if you like it hot, you can always use peppers too.  The way the fermented salsa tastes is incredible.  The probiotics that break down the food for you make it taste so very good.  I love to use it on eggs or with some tortilla chips.

This is a very fast post because I'm not sure how much attention the blog will get for awhile.  This is our first week back to homeschool and it has been a grueling schedule going from carefree summer mode to synchronized time slots for every move we make.  We are learning so much but our brains are on overdrive right now.  It will be nice to have that first weekend in a few days! :o)

Cheers


***You will need about 1-3 tablespoons of salt per jar and spring water covering contents completely.  For whey use 2 tablespoons of it and cover entirely with spring water and 1 tablespoon of salt.***

Leave jars on the counter at room temperature.  For salsa I usually leave it out for 3 days and the sauerkraut can ferment for 14-30 days depending on your own tastes.  I would taste it every 5 days to see if is is soft enough or meets your tastebuds with delight at which time you can refrigerate it.

In a day or so you will see the life in there of bubbles and activity.  It really is miraculous to see your food dancing and what it will help you do in your insides :)

Tuesday, August 2, 2011

Green Goddess Homemade Dressing #2

Well this is our all time favorite dressing and in addition to the honey mustard I have one more to share at a later date.


This dressing is super easy and only requires 4 ingredients! 

  • 1 Cup Mayo
  • 1 Cup Cilantro
  • 2 green onions ( I only needed one because this one from my garden was supersized, look at how long that baby is!!!)
  • 1/4 Cup pickle juice (no pickles!)
Blend all together and it is creamy, spicy and just has the best flavor.  My husband says this is his favorite dressing ever and I'm never allowed to purchase any in a bottle.  Try not to add all the juice at first because you want it to be a thicker consistency.  Slowly add in the pickle juice until the greens break down in the blender.  And make sure to cut up the onions and chop the cilantro if you have a standard blender (like me).  You don't want to stress it too much.  If you have something like a Vita-Mix it will be a breeze.

Enjoy

Sunday, July 31, 2011

Paleo Pumpkin Pie

Follow instructions on organic canned pumpkin but replace the sweetened condensed milk with organic coconut milk.

Recipe on the can is:

1 15 oz. can pumpkin
3/4 tsp. ground cinnamon
1/2 tsp. ground nutmeg
1/4 tsp. ground ginger
1/4 tsp. ground cloves
1/2 tsp. sea salt
1 14 oz. can coconut milk (substitution) *note, since the sweetened condensed milk is not being used in this recipe, I am sweetening slightly with pure maple syrup.  I am going to do 2 tbs.  Honey would be more paleo.
2 eggs, lightly beaten
The above is paleo, and if you did an almond crust that would be in line with paleo as well.  The pie crust shown in photo is not paleo.

1 9" deep dish pie shell (g-free)
or you can not use a crust at all and have it as custard.

***See below for recommended changes.

For the crust you can make one from almond flour or a box mix.  I had a box mix on hand so I will report back shortly with results and final photos.


***This pumpkin pie was so close to the original except for one thing...not sweet enough for the family.  With 2 tablespoons of maple syrup it just did not make it sweet at all.  It was more like savory pumpkin pie so I would change the sweetening to 1/2 cup sugar next time.  If it had been sweeter the family would have loved this, but they didn't like it as much.  I think if I had some whipped cream that might have helped but sprinkling with powdered sugar was the next best thing.

The crust mix was an extensive task but so well worth it in the end.  The crust was flaky and rich, everything you would expect a crust to be.  The almond flour crust is easier to make but I feel the extra steps for the regular gluten free crust is worth the time and effort.

In case you want the easier road (and more in line with paleo):

Almond Flour Crust

1 1/2 C. Almond Flour
1/4 tsp salt
1/4 tsp baking soda
1/4 cup olive oil for baking
2 tablespoons sugar or honey
1 tsp vanilla extract

Press in and bake for 10 min., then add filling and bake for about 50 min.

Cornflake Chicken

Here is a delicious recipe I got inspired to make this weekend.  There really are no measurements.  You just need to have the following ingredients:

  • Gluten free cornflakes
  • Chicken breast or whatever part you prefer
  • 1 Egg
  • Sea Salt
  • Cracked Pepper
  • Favorite spices
  • about a cup of sour cream
  • tablespoon honey (optional)
Wet:
egg, sour cream, salt & pepper, spices, honey (whisk all together until a nice sauce consistency)

Dry:
crushed cornflakes (you can put in a baggy and yield a rolling pin over the flakes until crushed consistency you desire)

Dip chicken into wet mixture and then roll in crumbs on a flat plate.  Drizzle with melted butter and fry in olive oil designed for high temperatures or bake.

Baking Instructions: 375 for at least an hour.  Cut a piece open to make sure all pink is gone and chicken is completely cooked through.  This is absolutely divine with the honey mustard dipping sauce.

Bon Apetit


OK Winner Winner Chicken Dinner!  That is just a funny saying but it means that this dish was a huge hit with the entire family.  I cut the kids portions into strips and gave them the honey mustard dipping sauce.  They were commenting the whole time with "mmm" and this is "so good".  Sunday dinner was definitely comforting especially after the wild weather we had yesterday.


edited to add: I ran low on the corn flakes so I had some other gluten free cereal that were shaped like cheerios.  I just combined those with the corn flakes and crushed it altogether.  I think it was even better than having only cornflakes because I had done a test batch the day before and comparing the two, I liked yesterday's version even better.  So you can experiment with using any cereal as the coating.

One last tip is when you dip the chicken to let it drip quite a bit before placing in the crumbs.  This will prevent the crumbs from getting too soggy before you are done making all your pieces.

Friday, July 29, 2011

Wrap Shirt revisited and altered

I absolutely love the wrap shirt I made that was one of my first sewing projects.  I thought the lace at the bottom would be my signature look on all the tops I created.  I think it might still be but I decided to alter the blouse to not include the lace and it fits really well this way.  The lace was sort of confining and went around the rear end a little on the tight side.  I cut through a side of it and tucked it under.  This was if I change my mind or want to try something different again, I still have the stretch lace there.  I also shortened the wraps.  They were so long I was wrapping them around about 3 times and that was too much.

For the original design visit the wrap shirt post, and here is the finished, altered look:

BEFORE:

AFTER:


I am going to be doing my apron this weekend and probably a few more sewing projects...maybe a pillow?  And hopefully some more of those cookies!  If I attempt any new recipes I will post.

Thanks fabric.com for your awesome free patterns and a big shout out to the girls at the shabby blog that I got my free header from.  I am really jazzed about the new blog look!  I feel it represents me better and makes me more enthusiastic about posting and sharing + Free is awesome and helpful!!! xxoo  So thank you again to those sites that make it possible to express our creativity without having to spend extra bucks.

Have a great weekend and see you next week :o)

Thursday, July 28, 2011

Inspiration to craft!

Must see video tutorial:

T Shirt Purse


And my results:

(click photo for close up view)
                                   
 SUPER FUN project but these little bags are really meant for light loads.  I put a water bottle and some items to run to the store and the water bottle sunk very far down and made the bag look extremely looong.  It's all good though!

Each was made with a recycled scarf and belt I had laying around so of course this cost ZERO.  This would be so great to make in a summer camp setting.  Kids would really go crazy with this :o)

*Cheers*

Pressies I recently made!

Well I completed these two projects little over a week ago.  Now that I'm certain the recipient has gotten the goods I couldn't wait to post about them.

To me, homemade gifts are given from the heart at a deeper level than "standard issue" items you can walk into the store and pick up or click online with your mouse. 

I was super happy with the outcome of these items made for a special August birthday girl, my friend Ella from the UK.  There were a lot of imperfections on these items but the love that goes into something you sew is greater than any flaw in my opinion!

First off we have the classic apron for all your household domestics, cooking, cleaning, etc.  I feel this is more of an apron/smock because I made quite a few pockets if you wanted to paint in this or have some tools placed in the pockets.

I made this in my favorite style of "empire waist".  All I did was attach a pillowcase (as you know I am famous for using).  I feel empire waist styling is really flattering, even in apron form!  The pillowcase serves as the front bodice and styling and as the pockets which I thought was clever.  I love this apron so much.  The only problem is I did not make one for myself and I am always on a domestic project.  So the next thing I will be making is my own apron and I will definitely post the results.  My real inspiration was that Ella and I speak about (and dream about) doing a gluten free bakery one day.  I imagined us donning these aprons as we applied fluffy pink frosting to our cupcakes....so that was the method behind the madness on this idea :o).  I say dream big and big dreams come true.

(wish this photo was more clear, have to rely on the kiddos to help with blog post pics, lol)

And now for the handbag.  I decided not to use any patterns on these creations.  I wanted it to be an original design by myself, which I feel adds a special quality when you decide to undertake handmade gifts.  You can tell that the bottom part is not perfectly aligned when I did the cutting but again more character! HAHA.  I also did a fun embellishment I learned on You Tube which is a fabric flower.  I will try to find that video to post because the gal that inspired me for making the fabric flowers is great at her craft.  All you do is take a piece of scrap material and cut about 5 half circles in them.  You then hand sew to bunch it up into a flower shape.  It is very easy and adds that special touch.  It is really hard to make out in this photo, but watch the tutorial above for instructions on making a fabric flower.


Well these are my last gifts for awhile (if not forever).  I did enjoy making quite a few things for friends and family.

*Cheers*

Saturday, July 23, 2011

Homemade Dressing #1 (Honey Mustard)

Well it's salad season in sunny California.  I would say salad is probably my most favorite dish even in winter.  I have always made my own dressings from scratch and they are so easy, I don't see why anyone would want to buy the prepared stuff anyway!

You can literally whip this up in seconds.

Honey Mustard Dressing

2 Tbs. Mayo
1 Tbs. Yellow Mustard
1 Tbs. Honey

Use whisk to incorporate all ingredients.


This also makes a delicious dressing for hamburgers, chicken, anything really.
Bon Apetit!

Chocolate Decadence Cookies

Have I got a great recipe for you chocoholics!  My youngest sons and I came up with this one to honor the head of our household for his birthday.  Happy Birthday Hunky Hubby!!!  He adores chocolate and these are cookies everyone can be happy about.  Gluten free and so rich and chocolatey.

Cheers To You!

Dry:
 2 1/2 C. Blanched Almond Flour
1 tsp salt
1 tsp baking soda

Wet:
1/2 C Butter
1/2 C. Sugar
1/2 C. Nutella
2 eggs
1 Tbs. Vanilla Extract
1 C. Chocolate Chips

Spoon rounded tablespoon onto cookie sheet lined with foil or parchment paper in batches of 6 each.  Refrigerate dough in between batches.  Bake at 350 degrees for 15 minutes, then allow to cool for 5 minutes on baking sheet before removing with spatula.  Transfer to wire rack to cool for 30 minutes before eating.  I really couldn't tell you the yield on these but a good estimate would be at least a dozen =).  We sampled quite a few before the final count.  Refrigerate cooled cookies in a ziploc or tupperware container.


The cookies spread out huge so they are a great oversized snack and dessert.
Bon Apetit!

Tuesday, July 12, 2011

In search of "fun" exercise!

On my list of things to do I have quite a few things to accomplish this summer.  One of those being to put a exercise regime full place in my life.

I have been researching quite a bit, and I want to make sure whatever I buy (if anything), will be a good investment and be really fun to do.

I came across an informercial for this product: Kettleworx which looks like it might fit the bill.  But for $90, not sure I want to spend that right now on something that might ultimately end up collecting dust.  I do really like the fact that on this one, you only work out Mon, Wed, and Fri for 20 minutes each day.  That sounds doable.

I also stumbled across: Bodyrocktv That woman's body is killer and she makes it her life to work out.  I am not sure I am that inclined to follow her routine.  Maybe I will take a little of each of their programs and make my own?

Was thinking to at least get a 5 lb. and 10 lb. kettleball as a starting point and go from there.  If anyone has exercise ideas or tips or what you are currently doing for exercise, leave a comment.

Enjoy your day! :o)

Lunch with Mother Nature

Well this week I am into short and sweet posts!  I have posted quite a few extensive topics since I resurrected the blog last month.

After our camping adventure it has taken me several days to get back to normal life.  Don't get me wrong, I adore being outdoors and roughing it a little.  But that was a long time to be living in a tent!

Yesterday I decided to go gathering in my backyard for my lunch.  Groceries are a bit scarce around here since we came back from camp.  So I thought I would see what Mother Nature provided me with.

I rounded up:

  • Eggs from our backyard chicks
  • tomatoes off our vines
  • green onions out of the garden
  • apples off the tree
Now if only the cilantro had not bit the dust :(

Anyway, I thought I did pretty well with my meal!  Completely satisfying and all provided from things we grew or raised.

And I felt very "paleo" :-D

Wrap Shirt

I found a great website for free patterns: Fabric.com

I made this cute top from their design.  It states to be a "beginner" pattern, but it was a little on the advanced beginner side in my opinion.


I added the lace detail at the bottom which is going to become my signature look on all the things I design.

This cute little purse is the next project I have in mind:

http://www.fabric.com/creativity-headquarters-free-pattern-downloads-sumatra-bag.aspx

Thursday, June 30, 2011

Creativity with Pillowcases

So I was packing for a camping vacation we are going on and realized my youngest sons did not have much in the way of luggage.  With the sewing streak I've been on, I knew I had to make something from items around the house.

My linen closet become a treasure trove of goodness, and it was like Christmas going  through all the pillowcases!  I wanted to create a duffle bag/knapsack type of goody for them to carry their clothes in.  It had to be soft and not too heavy for them to handle it themselves.

So this was born:


And the greatest part is all you need is:

  • Kids pillowcase
  • knit scarf
Each bag took me about an hour, maybe less.

Instructions:  Have the iron hot and the ironing board at your disposal.  Iron the pillowcase inside out to remove creases.  Cut the factory sewn seam at the bottom 1/4".  You will now have 2 open sides.  The top of the pillowcase will be where you feed the drawstring through and is already finished sewing-wise.

Now turn it right side out but tuck it back inside out to where you will double the material up.  Your pillowcase will be in half and you will sew the bottom and match the seam with the factory pillowcase stitch below where the drawstring with be applied.


Take a look at the inside to make sure all is well on the bag result and if you have it correct before sewing.  You may need to tuck the other way if you can tell it won't be proper when you sew.  My pictures beneath will show hemming the bottom.

Once your bottom and top seam all in place turn right side out and it should look like the beginnings of a carrying case.

Now iron again to make it nice and flat.  Measure across the top and find your half way point to cut into the first layer of pillowcase.  Be careful to not go through both layers.


Feed knit scarf through with safety pin after you have cut scarf and hemmed it making a "belt".


This was super easy and fun to make!

The great part about the knit scarf is you can wrap it all the way around and knot it at the bottom and it makes a handle too.


So all of this made me decide to make myself a cosmetic carrying case.  It looks kind of like a purse and very girly.  I made the same exact way as the boys, but I cut in every 5" to weave some tulle in and out and tied at one end.  Then I sewed some straps inside.


Here are the bottom and top seams I did:


(This was the factory seam that was previously cut and then turn right side out and folded in half to achieve the double material)


Iron and pin and align seam as much as possible with original factory stitch for a more flawless look.  One thing to mention is that 2 of the pillowcase were stitched at one of the sides so you will have to make your way through that when it comes to feeding the drawstring through.  The first bag I did was not stitched and the drawstring went all around with no challenges.

You can sew in some straps or just use the drawstring as a closure.  I think this was my most favorite project to date as you can tell by all the pics I snapped!!!  Much more simple than my huge robe project and less tiring.  I may be making these as gifts.  It really couldn't be easier! :o)

Tuesday, June 28, 2011

Repurposed Clothing and Household Items

I've been coming across some pretty cute ideas on the internet, and also imagining my own inspired creations.  The bathmat I saw on a sewing website forum and the skirt I have seen something similar out in the world; but have not seen anything on the internet, so I improvised and made this jean pillowcase skirt.

The bathmat is a fairly simple procedure but it creates a lot of terrycloth bits flying everywhere once you start cutting.  You take 2 unwanted towels.  They could be the color scheme of your bathroom decor for matching.  Simply cut the strips at about 5 inches wide and weave the strips alternating the colors in and out to form your design.  Pin everything in place and go around the outside first with your sewing machine, and then conquer the rows vertically and horizontally until the whole thing is sewn together.  I have not completed this project because I broke 3 needles on the sewing machine so I need to get some heavy duty needles to complete it.  But I think it's going to look great when all is said and done.


The skirt was fun to make!  Take any old pair of jeans and cut them off at the crotch area.  Attach a pillowcase to be the skirt part.  Remember inside out and pins!  You can cut slits on the sides at the bottom because the pillowcase will be very straight and not give a lot of range of motion to walk and move.  You could also do this with a regular free flowing skirt.  I want to try a ruffle skirt next with the jeans on top.  You can use lace through the belt loops for a cute and finished look.

*Lemon* Tiramisu, How I Love You...

Well let me tell you, my friend Ella gave me this great idea for a recent 50th Anniversary party I threw.  She sent me some recipes on a Tiramisu.  Normally, it is a chocolate/coffee confection and being in the midst of summer, the original sounds more of a winter/comforting combination.  So it was decided that Lemon Tiramisu would fit the bill perfectly.  This recipe is gluten-free and some of the folks attending do not care for chocolate.  The lemon version seemed to be right choice on all fronts.  There are several tips I will share that will make this labor intensive dessert a bit easier for you to make ahead.


I would seriously make this dish at least 4-5 days in advance.  And that is after it is all put together.  So you may be birthing this for up to a week!  I would highly recommend making the ladyfingers and lemon syrup at least 2 days before assembling, and letting it meld in the refrigerator for minimum of 3 days.

Gluten Free Ladyfingers
(adaped from Celiac Teen's recipe)
1/4 C Rice Flour
1/4 C Cornstarch
3 TB Other G-Free Flour (potato, sorghum, etc.)
3 Eggs Separated
3 TB Sugar
1/2 Tsp. Xanthan Gum (you could get away without it, so not to worry if you don't have available)

Beat the egg whites until stiff peaks with slow addition of sugar.  Whisk egg yolks until frothy and slowly add dry ingredients.  Eventually fold into egg whites reserving as many air pockets as possible.

Take batter and pour into large ziploc.  Snip off an end to serve as a piping tool and carefully pipe onto parchment paper or foil on cookie sheet.  Pipe out the size of a standard ladyfinger and do as many as you can and bake 350 degrees for around 10 min.  Sprinkle with powdered sugar and let cool and store in refrigerator.  You will need to do 2-3 batches to get to the 40 ladyfingers necessary.


Lemon Syrup

5-6 average size lemons
1 C Sugar
1 C Water

Zest all the lemons and squeeze juice from them removing any seeds.  Set aside

Bring water and sugar to boil and add 1/2 the juice from the lemons.  Once boiled, let cool and it will develop into a lemon simple syrup.

Filling
(adapted from Lidia's Italian)
2 C Mascarpone Cheese (I bet you could substitute cream cheese) room temperature
5 Eggs, separated (the yolks will be used to make lemon curd, and the whites will be whipped into meringue)
3 TB Sugar

Lemon Curd

Use a double broiler or round pyrex dish put inside a stockpot or saucepan filled with water to create steam and slowly heat the mixture.  Put the 5 egg yolks in the dish and whisk with 1/2 C Butter and 2 TB of sugar, half of the zest, and remaining lemon juice.  Whisk until the mixture becomes thick and pudding like.  Set aside to cool.

Whip the egg whites to stiff peaks and set aside.  Whip the Mascarapone or cream cheese with the remaining TB of sugar.

Dip all the completed ladyfingers in the syrup and start layering your first set of fingers on the bottom of a 9 x 13 pyrex.

Now fold the lemon curd, cheese mixture, and egg whites all together very softly.  Turn it over and over until incorporated.  This is the filling and you will layer this on top of the first set of ladyfingers.  Place another row of dipped ladyfingers (or you could just pour syrup over the bottom row and repeat process on the next layer of fingers).  Now put the remaining filling on top and decorate with remaining lemon zest.  Store for at least 3 days for best results on taste and texture.

This is so good and super fancy for very special guests.  It takes a lot of work and preparation but it will pay off in the end.

Monday, June 27, 2011

Towel Robe!

Oh my gosh!  This is a great way to recycle your old or unwanted towels.  This will only cost you what you have around the house and any embellishments you might have tucked away in your sewing kit.

You will need

  • 2 Large Bath Towels for the lower body of the garment
  • 1 Medium Bath Towel for the top of the garment
  • Sewing Machine
  • optional hand towels to make pockets or to make a belt
  • optional buttons, ribbon, embellishments of choice
  • And lots of time!


This is actually the first item I have sewn since high school, so it has been a long time and believe me this item is not without its flaws and imperfections.  However, it is not the type of attire that will be worn outside of the home, so there is really no need for perfection anyway.  It's just a robe, right?!
This is actually a gift I am sending to my great Aunt.  I think she is going to really enjoy it.

So what you will start to do is attach the 2 large bath towels together.  First you take the edges that will make your first seam and sew straight away on that line inside out.  Pin everything before you start sewing on the machine.  When you are done, it will be the side of the body of the garment.  Next you will start on the top part of the robe with the medium bath towel folded in half lengthwise.  Your project will look like a "T" basically at this point and the folded part will be cut into to create an opening for your neck.  You will already start to see your robe take shape as the medium bath towel will also serve as your sleeves too.  Now is the time to cut out your neckline.  You can just wing it or you can measure the half-way point and then cut in, making a half moon cut through both pieces of material.  Now make sure the robe is turned inside out and connect the back part of the medium towel to the center point of the large bath towel back.  Measure the sleeves on both sides to make sure you have an equal amount of fabric to account for an even sleeve on each side.  Once you attach the back, you can also attach your sleeves by seam at the elbow area.  By this point you can really tell what it is you're making.  Then of course, the front part of the medium towel goes onto the front part of the large towel to complete the basic steps of the robe.  I may not be writing this in the exact order of how I completed it.  But you will be making your own mark on this basic freestyle pattern.  Also note that the terrycloth will really get thick depending on your towel thickness.  So keep that in mind with your machine, (should you need a heavy duty needle or footpress).  Remember, everything is inside out.  I only say this because I am a novice and if someone else is too, you really may not have this information.  A good rule of thumb is to try it on as you go too.  This will definitely help you determine if you are heading in the right direction!

Now you can attach the other side of the large bath towel so it will look like a "pullover" at this point.  You will now have the basic design put in place.  Your towels have now been joined at all seams.  So you have a seam going down both sides, around the back, around the front, and under the sleeves.

Now would be the time for personal choices and design.  I decided to cut all the way up the front since this is for an elderly person.  I felt easy access was safer than her trying to put it over her head.  You could very well just stop at this point and have a pullover robe.  I did try the robe on at this point, and it was kind of constrictive and a little claustrophobic.  So if I ever made one for myself, I would make the front opening style.

I preferred to cut up the center.  Make sure you measure the width and cut in at the half-way point of that measurement.  For instance, if it is 26" wide, put a pin at 13" and use a ruler or something to guide your cut straight.

The last bit of business to do is to hem your neckline, the bottom if you wish ( I had to hem because my recipient is elderly and short and did not want her to trip), and the front will need to be hemmed at about 1-1 1/2 in. for a clean look.  Now you can add buttons or tie ribbons, a belt and loops, pockets, pretty much anything you want. 
I know this tutorial isn't that graphic and you do have to use your imagination for the most part.  But any questions I can help with, please leave a comment.  Please let me know how you like this too!  I will be really interested to hear if anyone gives this a try, and what the results are.

Enjoy! :o)

Some other shots with my "sort of" willing participants: